Showing posts with label chile. Show all posts

Monday, 21 October 2013

Southwestern Pork and Bean Soup


Southwestern Pork and Bean Soup

Why this recipe works: pork – based soups often use tough cuts of meat from the shoulder or hind area of the hog. While flavorful, these cuts require hours of simmering before they becomes tender. In this dish, we use pork tenderloin, which only requires about five minutes of cooking and plenty of aromatic ingredients to give our soup a robust taste. Building the flavor profile of the broth is key: after browning the pork and creating fond, we soften corn, scallion whites, and an Anaheim chile in the Dutch oven. With our foundation in place, we add heft with beans and chunky salsa. A topping of fried corn tortilla strips and crunch to this spicy soup.

Ingredients: serve 4
¼ cup vegetable oil
6 corn tortillas, halved and cut into ¼ inch strips salt and pepper
1 large pork tenderloin (about 1 pound), cut into ¾ inch chunks
1 cup corn kernels
1 Anaheim chile, seeded and chopped
6 scallions, sliced thin
1 (16 – ounce ) can black, pinto, or kidney beans, drained and rinsed
2/3 cup chunky salsa
1 cup chopped fresh cilantro
4 cups low – sodium chicken broth

Procedures:
  1. Heat oil in Dutch oven over medium – high heat until shimmering. Fry tortilla strips, stirring often, until crisp and deep golden brown, 2 to 4 minutes. Using slotted spoon, transfer tortilla strips to paper towel – lined plate and season with salt and pepper.
  2. Add pork to oil in pot and cook until well browned, about 3 minutes. Transfer pork to bowl and set aside. Add corn, chile, and scallion whites to pot and cook until softened, about 5 minutes.
  3. Stir in beans, salsa, ½ cup cilantro, and broth and bring to boil, scraping up any browned bits. Simmer over medium heat until soup is slightly thickened and flavors meld, 8 to 10 minutes. Stir in browned pork, along with any accumulated juices, and cook until heated through, about 2 minutes. Top soup with scallion greens, remaining cilantro, and tortilla strips. Serve

Smart shopping salsa
If you don’t want to bother pulling out the food processor, or if you can’t find acceptable tomatoes, the fresh salsa in your supermarket’s refrigerated case can be nearly as good as homemade. But if you’re really looking for convenience and need a salsa with a longer shelf life, our two top salsas – medium and hot – are a descent option. Old el paso thick and chunky medium salsa, praised for its “bright, spicy flavors,” is our favorite medium variety. If you’re looking for heat, try pace chunky hot salsa, which tasters described as both “full – flavored” and “fairly spicy”.

Tuesday, 15 October 2013

Shrimp Salad with Chili tomato


Shrimp Salad with Chili tomato Vinaigrette
Why this recipe works: shrimp is America’s favorite shellfish, and it’s no wonder: their subtle yet recognizable flavor works well in concert with any number of other ingredients and in just about any type of dish. For this shrimp salad, we begin by making the chili tomato vinaigrette. We found that using cherry tomatoes instead of a larger variety yields rich, full flavor of the salad, we needed our vinaigrette to be distinctive and bold, so we added a fresh jalapeño to the roasted tomatoes. For the salad itself, we prefer to make things simpler by using already cooked shrimps. If you are using uncooked, then poach them in salted water until they’re pink and just cooked through, 3 to 5 minutes. We always use fresh seasonal corn if it’s available, but if it’s not, frozen kernels are acceptable as long as they’re thawed before they’re incorporated into the salad. We toss the arugula into the salad just before serving to keep the leaves from wilting.

Shrimp Salad with Arugula, Corn and Chili tomato Vinaigrette
Ingredients: serve 4
2 pints cherry tomatoes, cut in half
6 garlic cloves, sliced thin
7 tablespoons extra virgin olive oil salt and pepper
1 jalapeno chile, stemmed, seeded, and minced
3 tablespoons red wine vinegar
1 pound precooked large shrimp
3 ears corn, kernels removed from cobs (about 2 cups)
1 (5 ounce) bag baby arugula

Procedures:
  1. adjust oven rack to middle position and heat oven to 450 degrees. In large bowl, toss 1 pint tomatoes and garlic with 2 tablespoons oil and season with salt and pepper. Arrange these tomatoes cut side up on rimmed baking sheet and roast until skins begin to brown on bottom, about 20 minutes. Return tomatoes to bowl and stir in jalapeño, remaining oil, and vinegar and season with salt and pepper.
  2. Meanwhile, cut remaining tomatoes in half again to make quarters. In large bowl, toss these tomatoes with shrimp, corn, and roasted tomato vinaigrette until thoroughly mixed, then add arugula and toss until fully coated. Season with salt and pepper. Serve.

Quick prep tip roasting cherry tomatoes
Once the tomatoes are tossed in the oil and seasoning, place them cut side up on a baking sheet for maximum moisture evaporation. Roast in a 450 degree oven, rotating the tray halfway through cooking to ensure even roasting. The tomatoes are done in about 20 minutes, when the skins begin to brown on the bottom. 

Wednesday, 9 October 2013

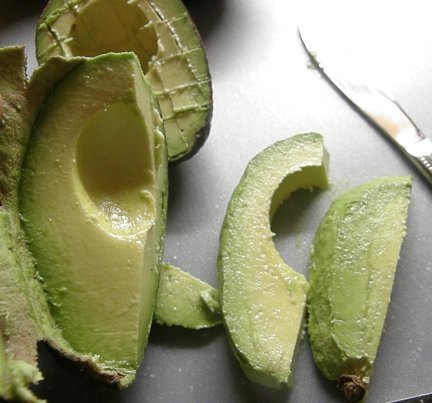
Healthy Avocado Chunky Guacamole Recipe

Ingredients:
4 to 5 ripe avocados, peeled, seeded, and coarsely cut into 1/2-inch pieces
2 to 3 tablespoons fresh milk
4 to 5 medium tomatoes, peeled, seeded and diced(optional)
1/2 medium-size onion, finely minced
1 chile pepper of your choice, finely minced Coarse salt to taste(optional)
1 to 2 tablespoon sugar (optional)

Preparation:
1.To cut the avocado, place it within the palm of your hand and insert a pointy knife with a blade a minimum of two inches longer than the avocado. while not moving the knife, roll the avocado around, slicing it prime to bottom and back to the highest. a mild twist can separate the 2 halves of the avocado, exposing the meat and therefore the seed within.

2. To remove the seed carefully

3. Score the inner meat with a butter knife each horizontally and laterally. These are going to be the cubes when the skin is turned towards within out. If the avocado is ripe flesh ought to fall out because the skin is turned. Repeat this with the remaining avocados. Place the cubes into a medium sized bowl and sprinkle with the lime juice; put aside.

4. In a giant bowl, mix tomatoes, onion, chile pepper, and salt. Gently stir within the avocado cubes and cilantro. Serve. (can be stored within the refrigerator for up to two to three hours).

Let come back to area temperature before serving. function a salad or as a dip with corn or flour tortillas.

Monday, 7 October 2013

Coconut Curry Mussels with Noodles


Coconut Curry Mussels with Noodles
Why this recipe works: for this Thai inspired weeknight dinner, we developed a streamlined curry sauce to serve over quick cooking mussels and fresh egg noodles. We use store bought green curry paste as the basis of our broth; It’s quick and convenient way of building complex curry flavor without having to rely on hard – to – find ingredients. We add coconut milk and fish sauce to the broth for the sake of authenticity, and minced jalapeño for a kick of heat. The noodle take very little time to cook, so we don’t start them until the mussels are done. Occasionally, mussels have harmless weedy piece – know as the beard – protruding from between the shells. Remove the beard just before cooking by holding it between your thumb and a butter knife (or the flat side a paring knife) and giving it a quick tug. Discard any mussels that fail to open during cooking.

Coconut Curry Mussels with Noodles
Ingredients: serve 4
1 tablespoon vegetable oil
3 tablespoon green curry paste
2 (13.5 ounce) cans coconut milk
2 teaspoons brown sugar
2 tablespoons fish sauce
3 tablespoons lime juice
1 jalapeño chile, seeded and minced
3 pounds mussels, scrubbed and debearded
1 tablespoon salt
2 (9 ounce) packages fresh Chinese egg noddles
½ cup roughly chopped fresh cilantro
½ cup roughly chopped fresh basil

Procedures:
  1. Bring 3 quarts water to boil in large saucepan. Heat oil and curry paste in Dutch oven over medium – high heat until fragrant, about 90 seconds. Stir in coconut milk, sugar, fish sauce, lime juice, and jalapeño. Bring to a simmer until flavors have melded, about 5 minutes. Add mussels, cover, and cook, stirring occasionally, until mussels open, 4 to 8 minutes.
  2. Add salt and noodles to boiling water and cook until all dente, about 3 minutes. Drain noodles.
  3. Divide noodles among 4 bowls. Using slotted spoon, transfer mussels to bowls with noodles. Add cilantro and basil to broth, then pour broth over mussels and noodles. Serve.

Smart shopping mussels
Virtually all mussels commercially marketed are formed and rope – cultured, which means they are remarkably clean and relatively grit – free. That being said, they should still be scrubbed with a stiff brush prior to cooking. They must also be “de bearded.” That is, the fibrous strands extending from within the shell must be yanked free(this should be done just before cooking). Be wary of gaping mussels, or mussels that won’t close when prompted. If they don’t close tightly, don’t cook them as they may be dead. If you purchase mussels ahead of time and need to store them, keep them in the refrigerator in a colander covered with a damp kitchen towel; if they are sealed in plastic, they will die.

Thursday, 4 July 2013

Molasses Glazed Beef kebabs with Black eyed Pea Salad all recipes

Molasses Glazed Beef kebabs with Black eyed Pea Salad
Why this recipe works: The sweetness of the orange juice, combined with the slightly bitter, smoky edge of molasses and the subtle hint of heat from the jalapeño, gives these beef kebabs a big boost of flavor and adds complexity and intrigue. Steak tips, a.k.a. flap meat, are sold as whole steaks, cubes, and strips. To ensure equally sized chunks that will cook evenly, we prefer to purchase a whole steak and cut it our selves. If whole steaks are not available, our second choice is to cut the tips from strips. The bottom line? Precut steaks tips should be avoided. For maximum caramelization of the glaze, we cut the beef into large 2 inch pieces. This ensures that the meat won’t overcook in the time it takes to brown and caramaelize the exterior. We increased the amount of steak from our usual 1 ½ pounds (for four people) to 2 pounds, who what our kebabs have 4 to 5 pieces of meat per skewer. Fresh squeezed or bottled orange juice can be used in this recipe.

Ingredients:
1 cup orange juice
½ cup, plus 1 teaspoon unsulfured molasses
2 tablespoons lime juice
1 jalapeño chile, seeded and minced
3 garlic cloves
¼ cup chopped fresh cilantro
¼ cup extra virgin olive oil
2 (15.5 ounce) cans black eyed peas, drained and rinsed
1 red bell pepper, seeded and diced salt and pepper
2 pounds steak tips, cut into 2 inch chunks

Procedures:
  1. In medium saucepan, bring orange juice to boil over high heat and reduce to 1/3 cup, about 3 minutes. Stir in ½ cup molasses and continue to boil until mixture reduces to ½ cup.
  2. Meanwhile, whisk lime juice, remaining 1 teaspoon molasses, jalapeño, 1 clove garlic, cilantro, and olive oil in medium bowl. Toss in peas and bell pepper. Season with salt and pepper
  3. Whisk molasses mixture with remaining 2 cloves garlic, ¾ teaspoon pepper, and ½ teaspoon salt in small bowl. Toss beef with molasses mixture. Thread meat evenly onto four 12 – inch metal skewers. Grill kebabs over hot fire, covered, and turn frequently until meat is well browned, 8 to 10 minutes. Serve with black eyed pea salad.

Tools skewers
If you’re cooking over very high heat, bamboo skewers will burn and break apart – no matter how long you soak them in water beforehand. We had better luck with metal skewers. They may cost more, but they’re reusable and they can handle the heartiest kebabs without bending or breaking. Not all metal skewers are created equal, however. We had a tough time flipping food on round skewers – the skewer itself turned just fine, but the food stayed in place. Double – pronged skewers turned the food, but some were flimsy and most had a tendency to twist out of their parallel configuration. Other models were to sturdy, with bulky skewers that mangled the meat. Flat skewers proven much more effective, and although any flat skewer will do, we found one set we particularly liked for its price and thickness: Norpro’s 12 inch Stainless Steel Skewer